|
The tutorial is written with PSP 2018 but can also be done with other versions.
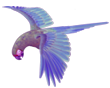
To retrieve the material click on the parrot

------
Homesickness (Nostalgie)
-----
Filters
Filter Alien Skin Eyes Candy Textures/Texture Noise/Subtle shadows
Filter Alien Skin Eyes Candy Textures/Texture Noise/Snow Fall
Graphic Plus/Cross Shadow
Filter Alien Skin Xenofex 2/Constellation
-------
**************************
This tutorial is my property, it is forbidden to copy or distribute it on the Internet without my written permission.
Likewise it is forbidden to erase the watermark of the material
Respect the work of the tubeuses without which we could not create tutorials
******************
If you are ready we start :
-----
Open image alpha nostalgie, duplicate and close the original
Choose two colors one dark color in the foreground for me #b03979 and one light color in the background for me #ffffff
Selections/Select all
Open background image
Edit/Copy
Edit/Paste into the selection
Selections/select none
Effects/Image effect/Seamless Tiling (Default)
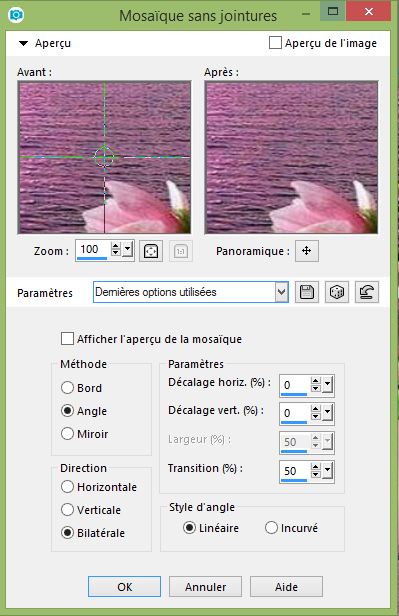
Adjust/Blur/Gaussian Blur (30)
Effects/Plugins/Graphic plus/Cross Shadow (everything at 50)

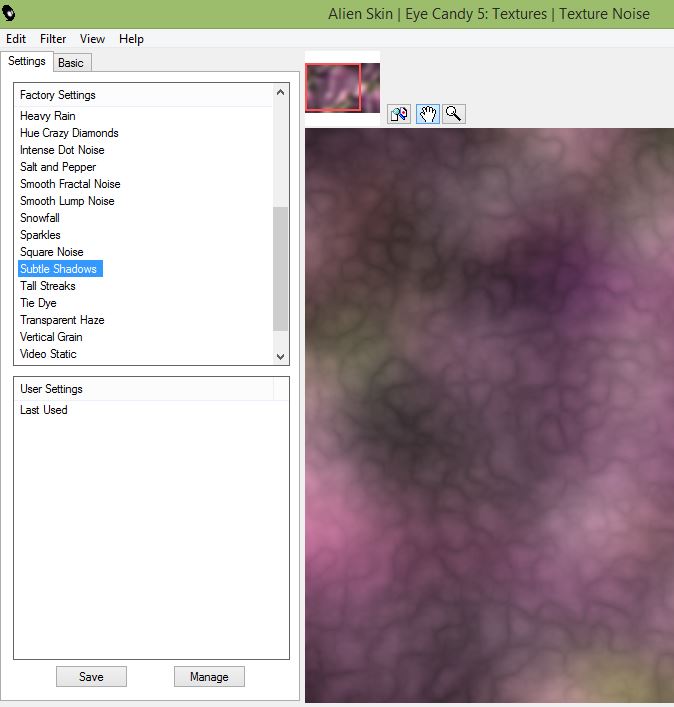
Effects/Plugins/Alien Skin Eyes Candy/Textures/Textures Noise (preset Subtle shadows)
Effects/Plugins/Alien Skin Eyes Candy/Textures/Textures Noise (preset Snow fall)

Adjust/Sharp/Sharpness
Layers/New raster layer
Fill with background color (white)
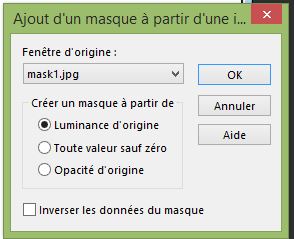
Open "Mask 1" minimize it
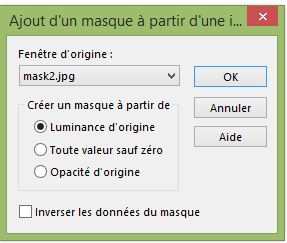
Layers/New Mask Layer/From image
Effects/Edge effects/Enhance
Layers/Merge/Merge group
Selections/Load save selection/Load selection from alpha channel/Selection 1
Open misted 1 (or yours), copy it and paste it into the selection
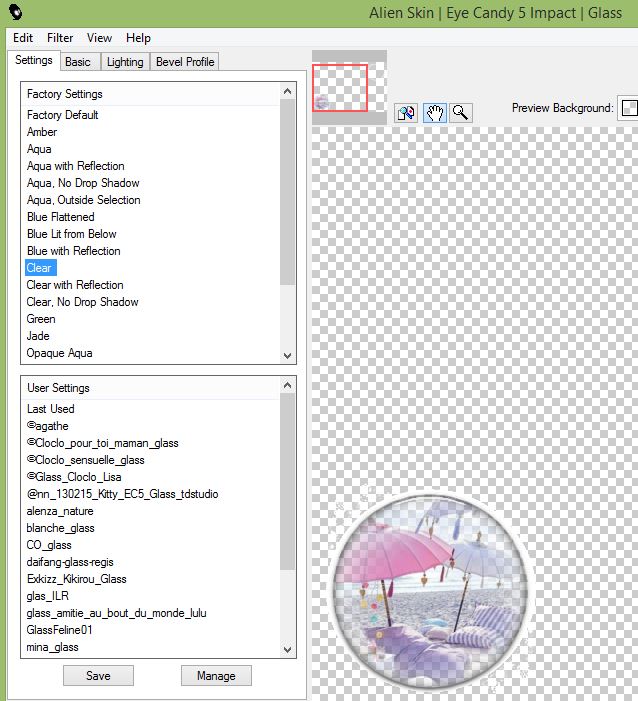
Effects/Plugins/Alien Skin Eyes Candy Impact/Glass (preset Clear)
Selections/Select none
Selections/Load save selection/Load selection from alpha channel/Selection 2
Open misted 2 (or yours), copy it and paste it into the selection
Effects/Plugins/Alien Skin Eyes Candy Impact/Glass (preset Clear)
Selections/Select none
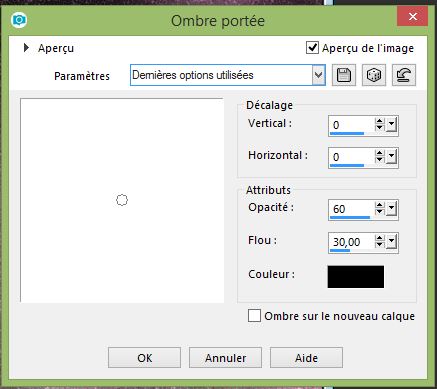
Effects/Effects 3D/Drop Shadow (0/0/60/30 black)
Layers/New raster layer
Fill with background color (white)
Open "Mask 2" minimize it
Layers/New Mask Layer/From image
Effects/Edge effects/Enhance
Layers/Merge/Merge group
Open landscape misted (or yours),
Adjust/Sharp/Sharpness
Open main tube copy it and paste it on your tag
Layers/Merge/Merge all
Image/Add borders/2 foreground color
Image/Add borders/30 background color (white)
Image/Add borders/2 foreground color
Image/Add borders/40 background color (white)
Image/Add borders/2 foreground color
Sign your tag
Open your corner
Edit/ Copy and Edit/Paste on your tag
(Put it like on my tag)
Image/Resize to 950
If you do not do the animation, merge all and register as JPEG
Animation
Open Animation Shop
On your work PSP,
On the layer of corner
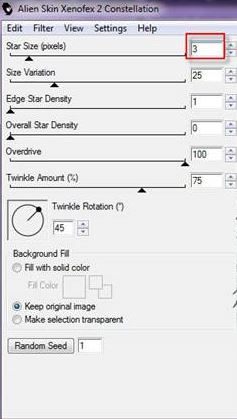
Effects/Plugins/Alien Skin Xenofex 2/Constellation
Click on the settings tab and check "Glimmer"
after 3/25/1/0/100/75 and keep original image
 ok ok
Edit/Copy special/Copy merged
In Animation Shop paste as a new animation
**Return to PSP
Cancel "Constellation" and in the plugin "Constellation" click only on Random Seed
Edit/Copy special/Copy merged
In Animation Shop paste after active image**
Redo from **to** twice
Save in GIF
Here it is, I hope that the realization of this tag has pleased you
Thanks you for having realizing
Thanks to Garances who checks my all tutorials
Garances 30/05/2018
RETOUR AU MENU
|